44 Inch Kitchen Sink Base Cabinet
Difficulty
Intermediate
| 
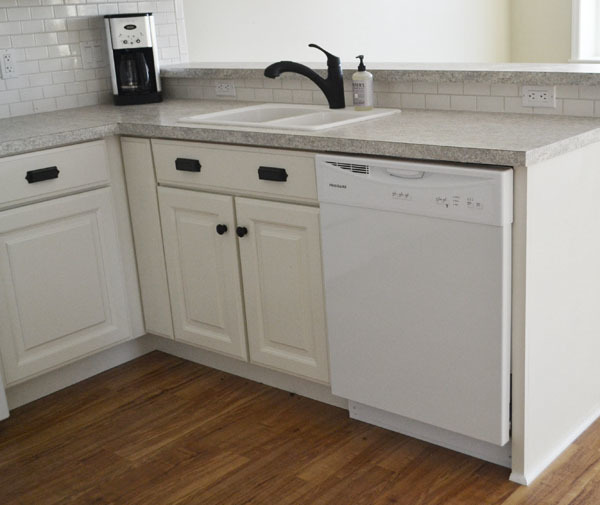
Build your own kitchen from scratch! Free plans by ana-white.com for a standard 36" sink base cabinet
Happy Friday!!!
Thank you all for your positive feedback on the Ram's Kitchen Cabinet Carcass video - between me and you - it really made his day and he's really excited about doing more videos. Both of us truly enjoy seeing our hard work matter to others - so thank you!
For today's plan, I promised you a more standard kitchen sink base cabinet - a 36" width. We had to go with the 30" for the Momplex because of the space (went for a bigger hallway so the kitchen got shortened by 6"). I definitely recommend the bigger sink base.
The plans follow - and if you are building and haven't already - check out the Ram's video - below - going through all the steps:
Have a great weekend!
XO Ana + Family
Dimensions
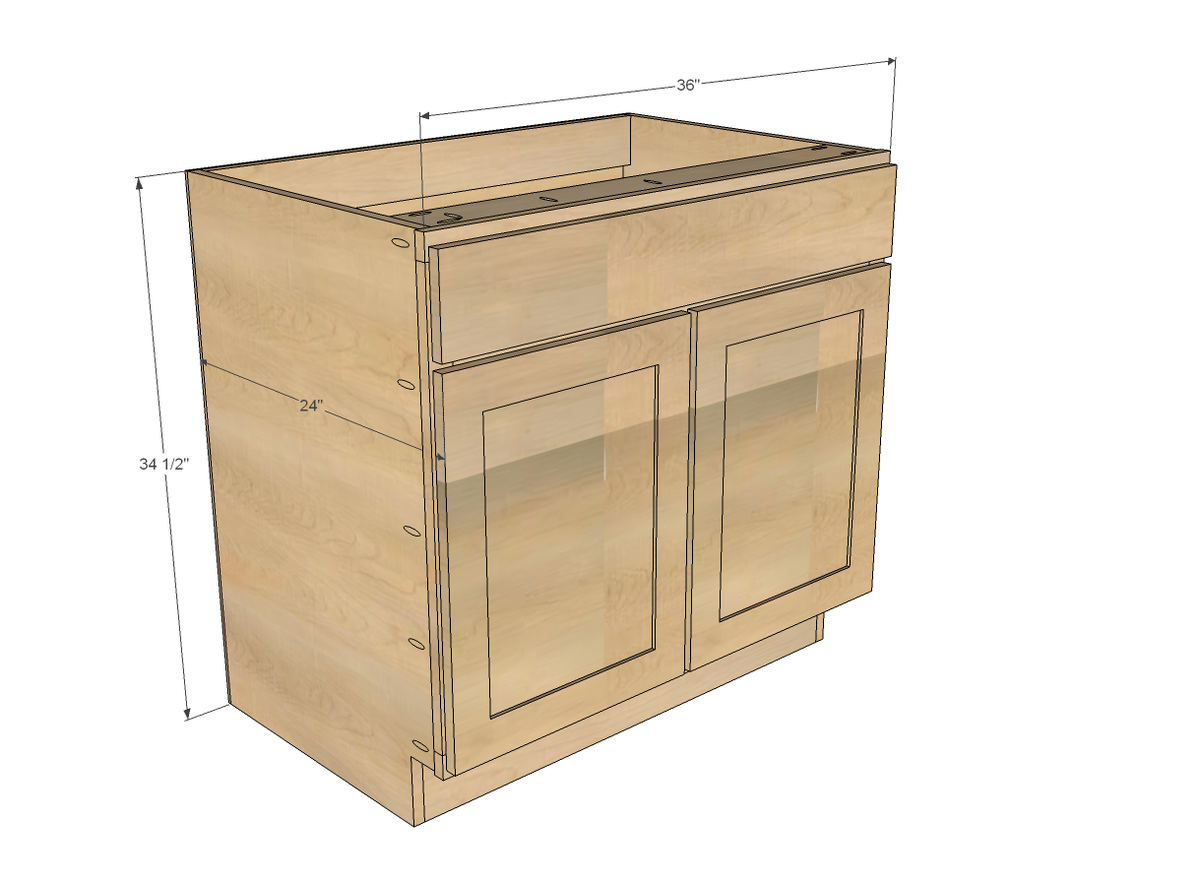
36" sink base - overall 24" with doors - inside dimension is 22-1/4" deep x 34" wide
Preparation
Cut List
CARCASS
2 - 3/4" plywood @ 22-1/4" x 34-1/2" (side panels)
1 - 3/4" plywood @ 22-1/4" x 34" (bottom shelf)
2 - 3/4" plywood @ 5" x 34" (bottom supports)
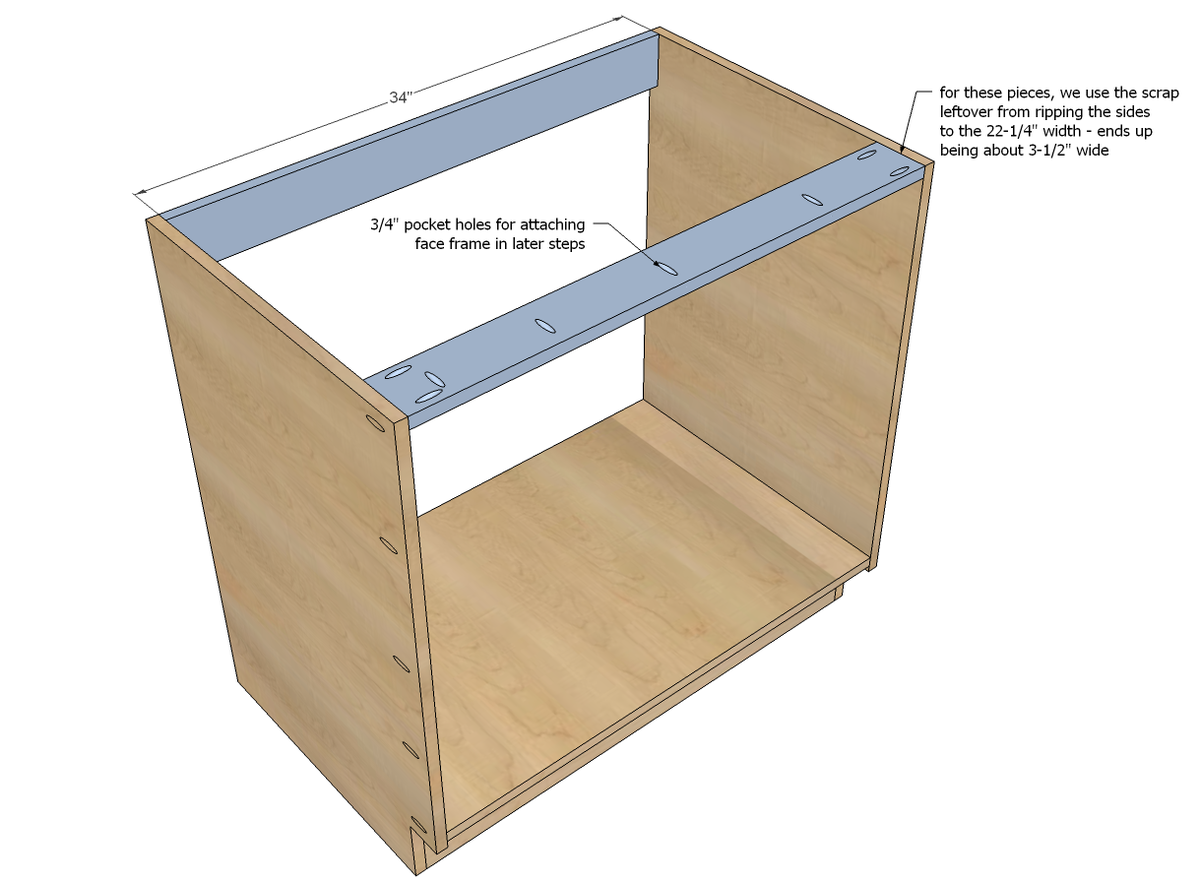
2 - 3/4" plywood @ 3-1/2" (can vary) x 34" (top supports)
1 - 1/4" plywood @ 32" x 35-1/2" (back)
FACE FRAME
2 - 1x2 @ 27"
2 - 1x2 @ 36"
1 - 1x2 @ 33"
1 - 1x3 @ 21"
SHELVES - optional (unlikely for sink base)
3/4" plywood @ 22" x 27-3/4" (measure and adjust to fit shelf pins/edge banding)
DOOR/DRAWER FACE for FULL OVERLAY (1-1/4")
5 1/2" x 35-1/2" (drawer face) - can be taller
2 - 22-1/2" x 17-1/2" (door)

General Instructions
Please read through the entire plan and all comments before beginning this project. It is also advisable to review the Getting Started Section. Take all necessary precautions to build safely and smartly. Work on a clean level surface, free of imperfections or debris. Always use straight boards. Check for square after each step. Always predrill holes before attaching with screws. Use glue with finish nails for a stronger hold. Wipe excess glue off bare wood for stained projects, as dried glue will not take stain. Be safe, have fun, and ask for help if you need it. Good luck!
Instructions
Step 1
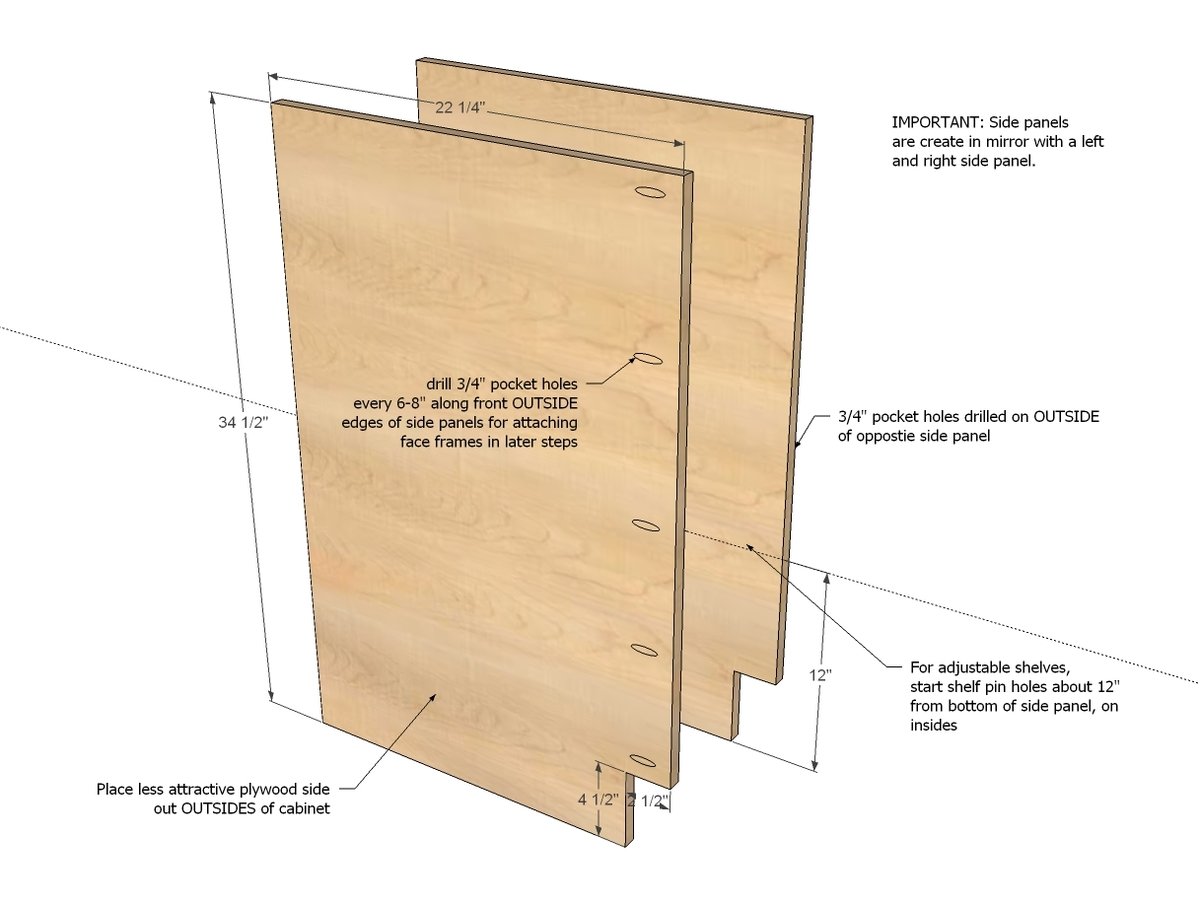
Start by creating your two side panels in mirror.
Step 2
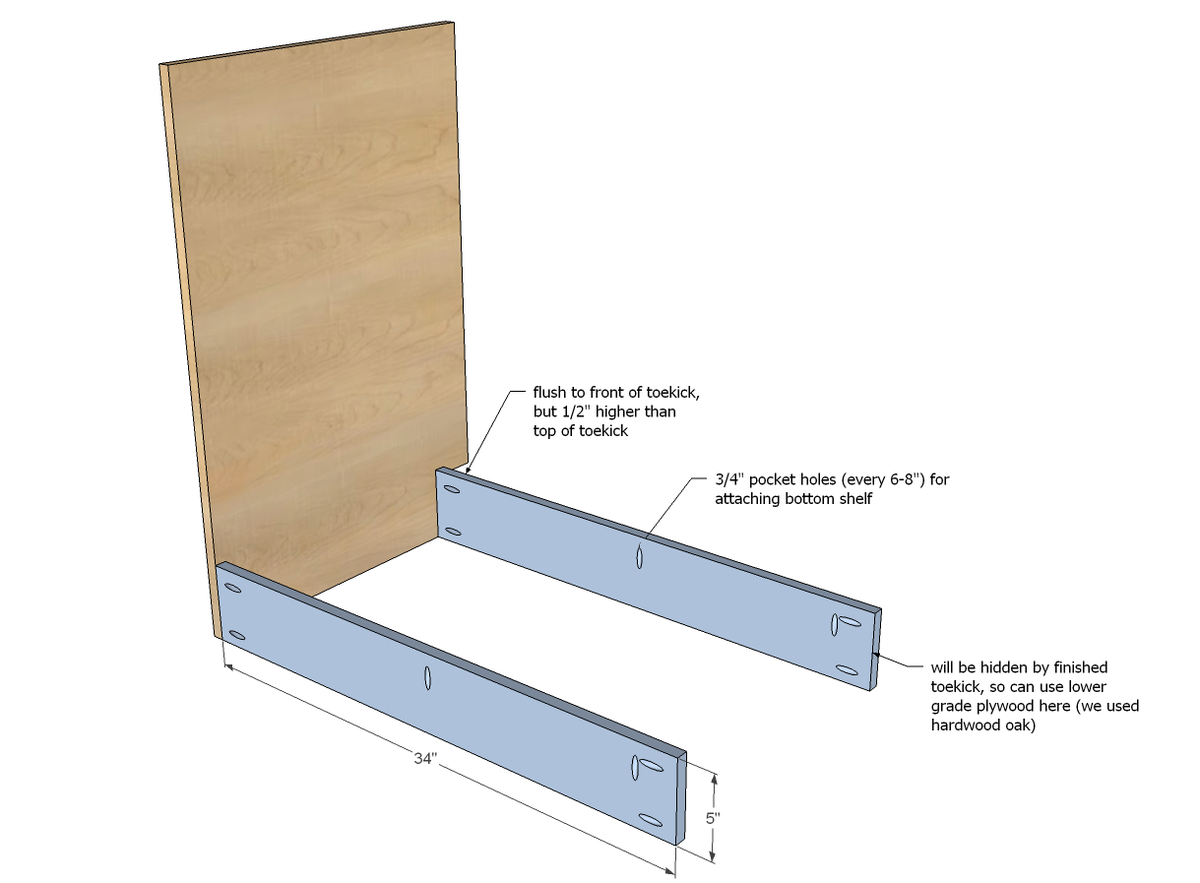
Attach the two bottom supports to the two side panels.
Step 3
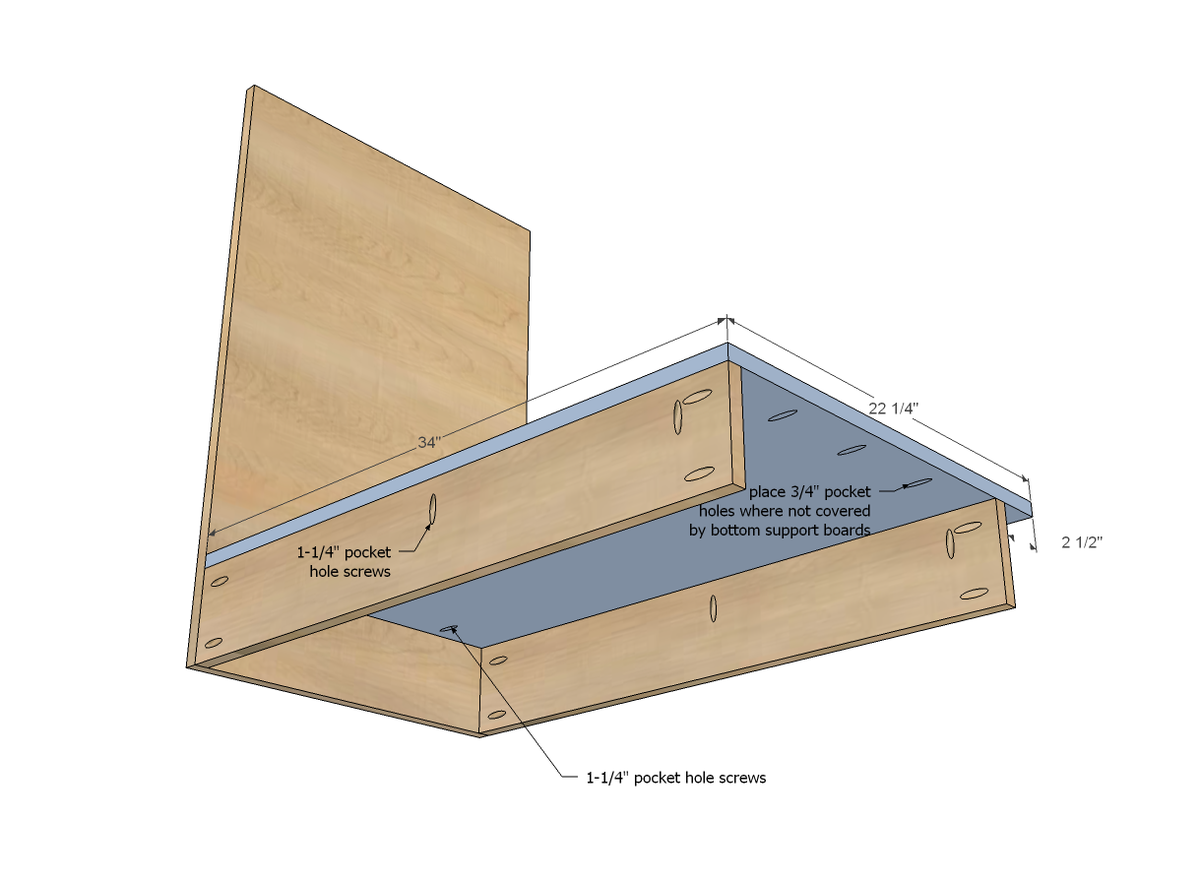
Attach bottom shelf to two bottom supports and side panel.
Step 4
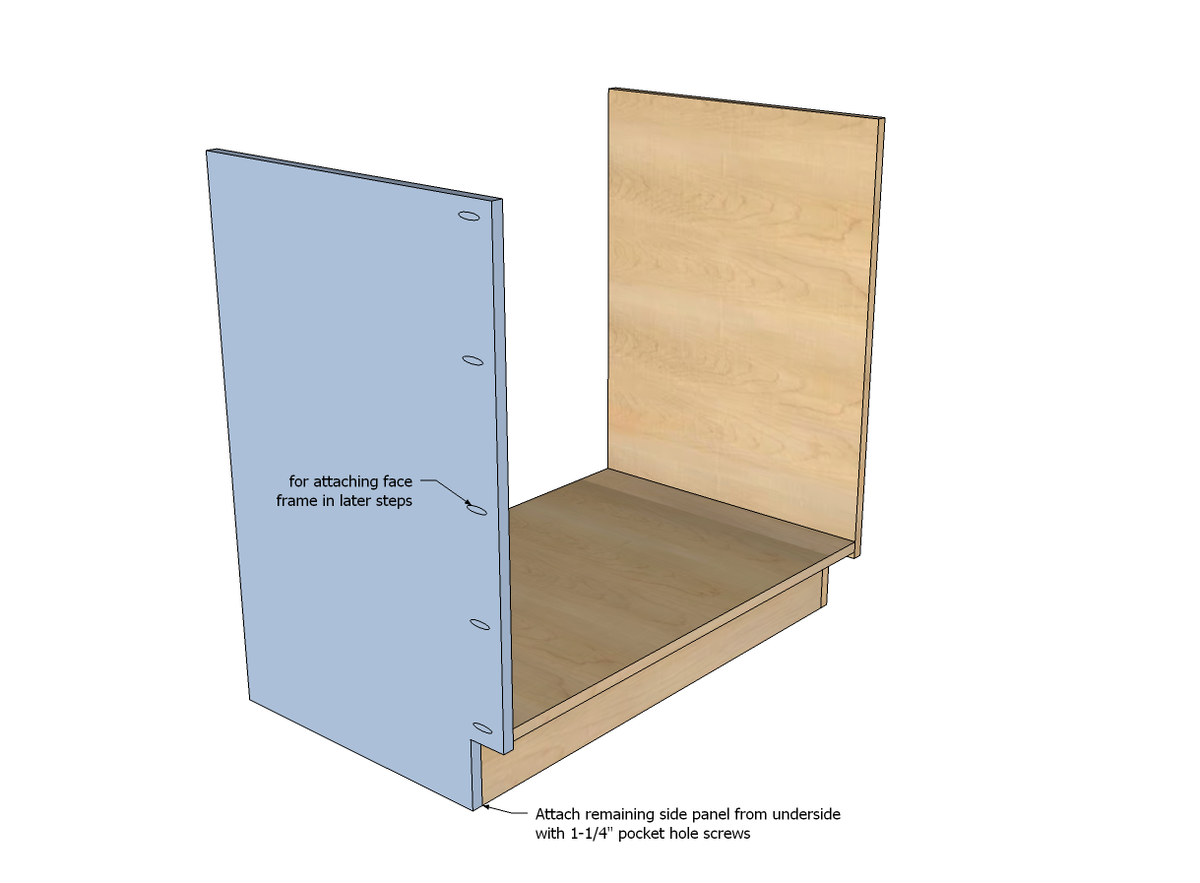
Attach remaining side panel to the base.
Step 5
Step 6
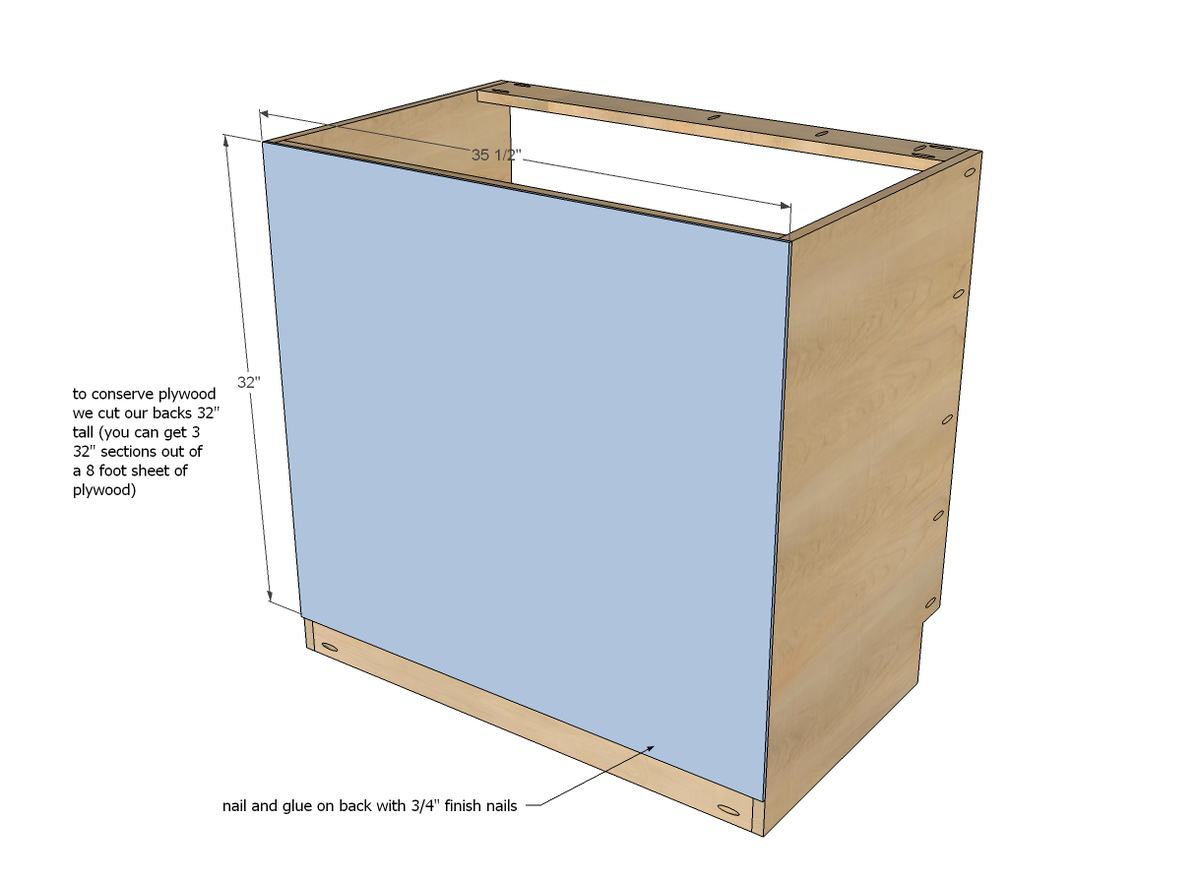
Attach back with 3/4" finish nails and glue - back could be optional on a sink base to allow for plumbing, but you should still add some 1/4" plywood to the back at the top and bottom to bring the cabinet out 1/4" to match other cabinets with backs.
Step 7
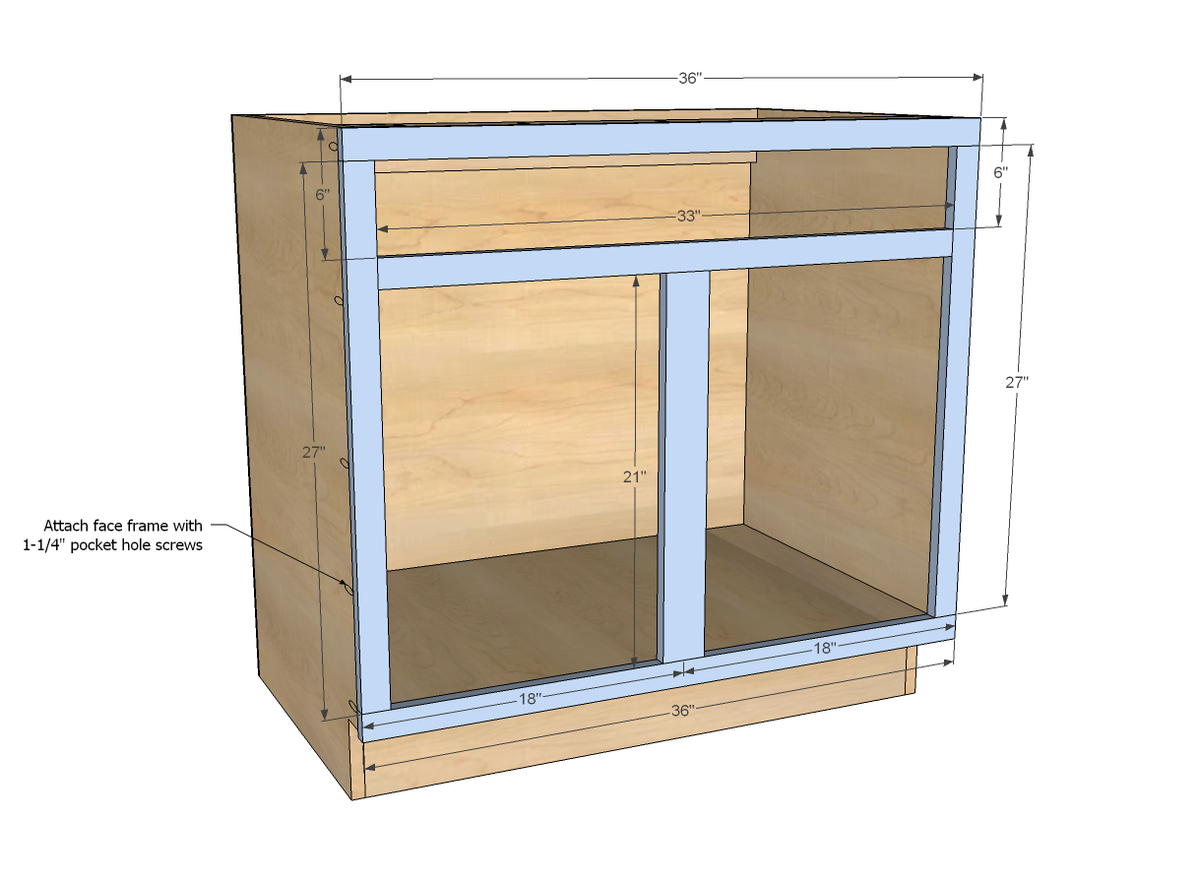
Build your face frame separately, and then attach the completed face frame to the front of your kitchen cabinet. Sides over extend by 1/4" on each side, top is flush, bottom is flush on sides, with bottom shelf 1/2" set up.
Step 8
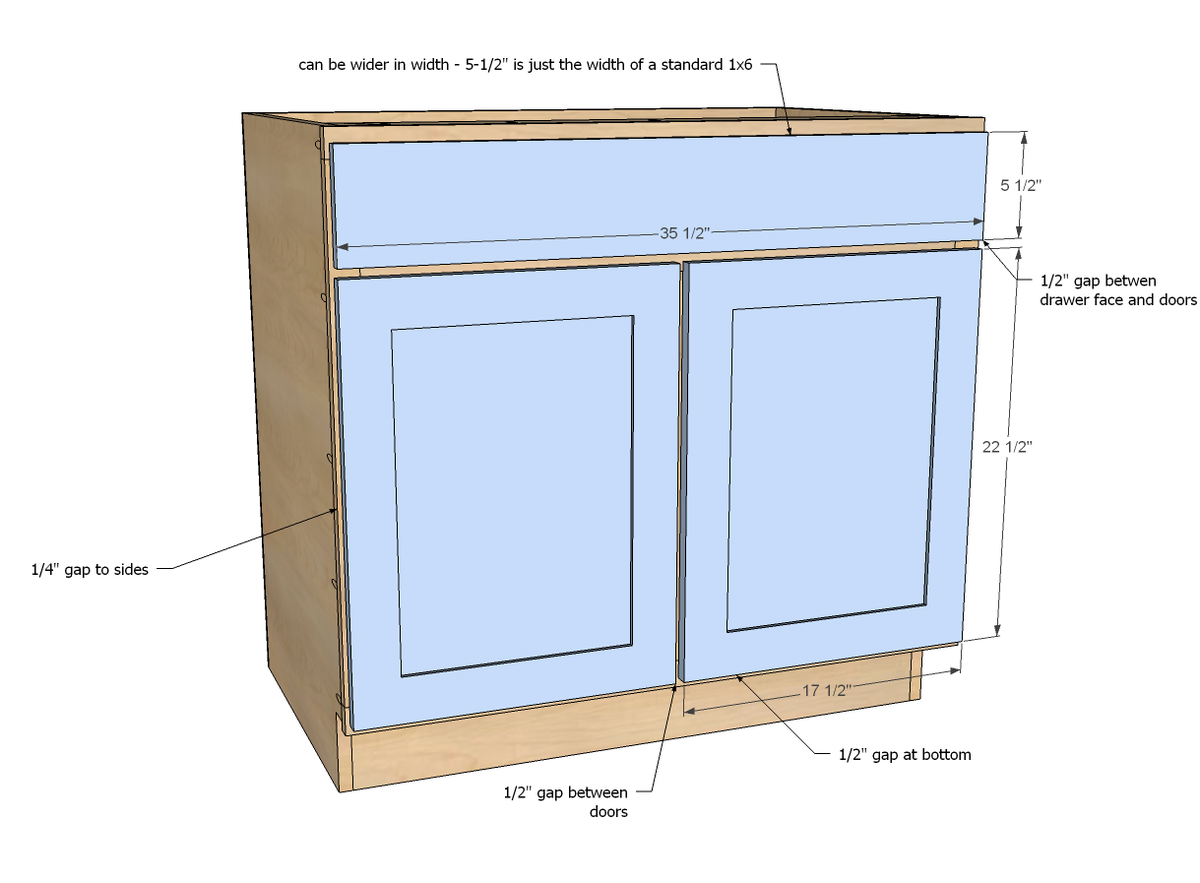
We used full overlay doors attached with concealed euro hinges, 1-1/4" overlay for face frame doors. Doors were ordered from Cabinet Now (not sponsored - just great product).
Preparation Instructions
Fill all holes with wood filler and let dry. Apply additional coats of wood filler as needed. When wood filler is completely dry, sand the project in the direction of the wood grain with 120 grit sandpaper. Vacuum sanded project to remove sanding residue. Remove all sanding residue on work surfaces as well. Wipe project clean with damp cloth.
It is always recommended to apply a test coat on a hidden area or scrap piece to ensure color evenness and adhesion. Use primer or wood conditioner as needed.
44 Inch Kitchen Sink Base Cabinet
Source: https://www.ana-white.com/woodworking-projects/36-sink-base-kitchen-cabinet-momplex-vanilla-kitchen